Managing Item Groups
Overview
Item Groups allow you to organize your catalog into manageable categories. Item Groups simplifies inventory tracking, purchasing, and reporting. Learn how to create, edit, and organize item groups in your catalog.
Navigation
To access the Item Groups section:
- Navigate to Catalog in your main menu.
- Click on Item Groups.
You’ll be presented with two layout views:
- Card View (default)
- List View
Use the toggle icon beside the search bar to switch between them.
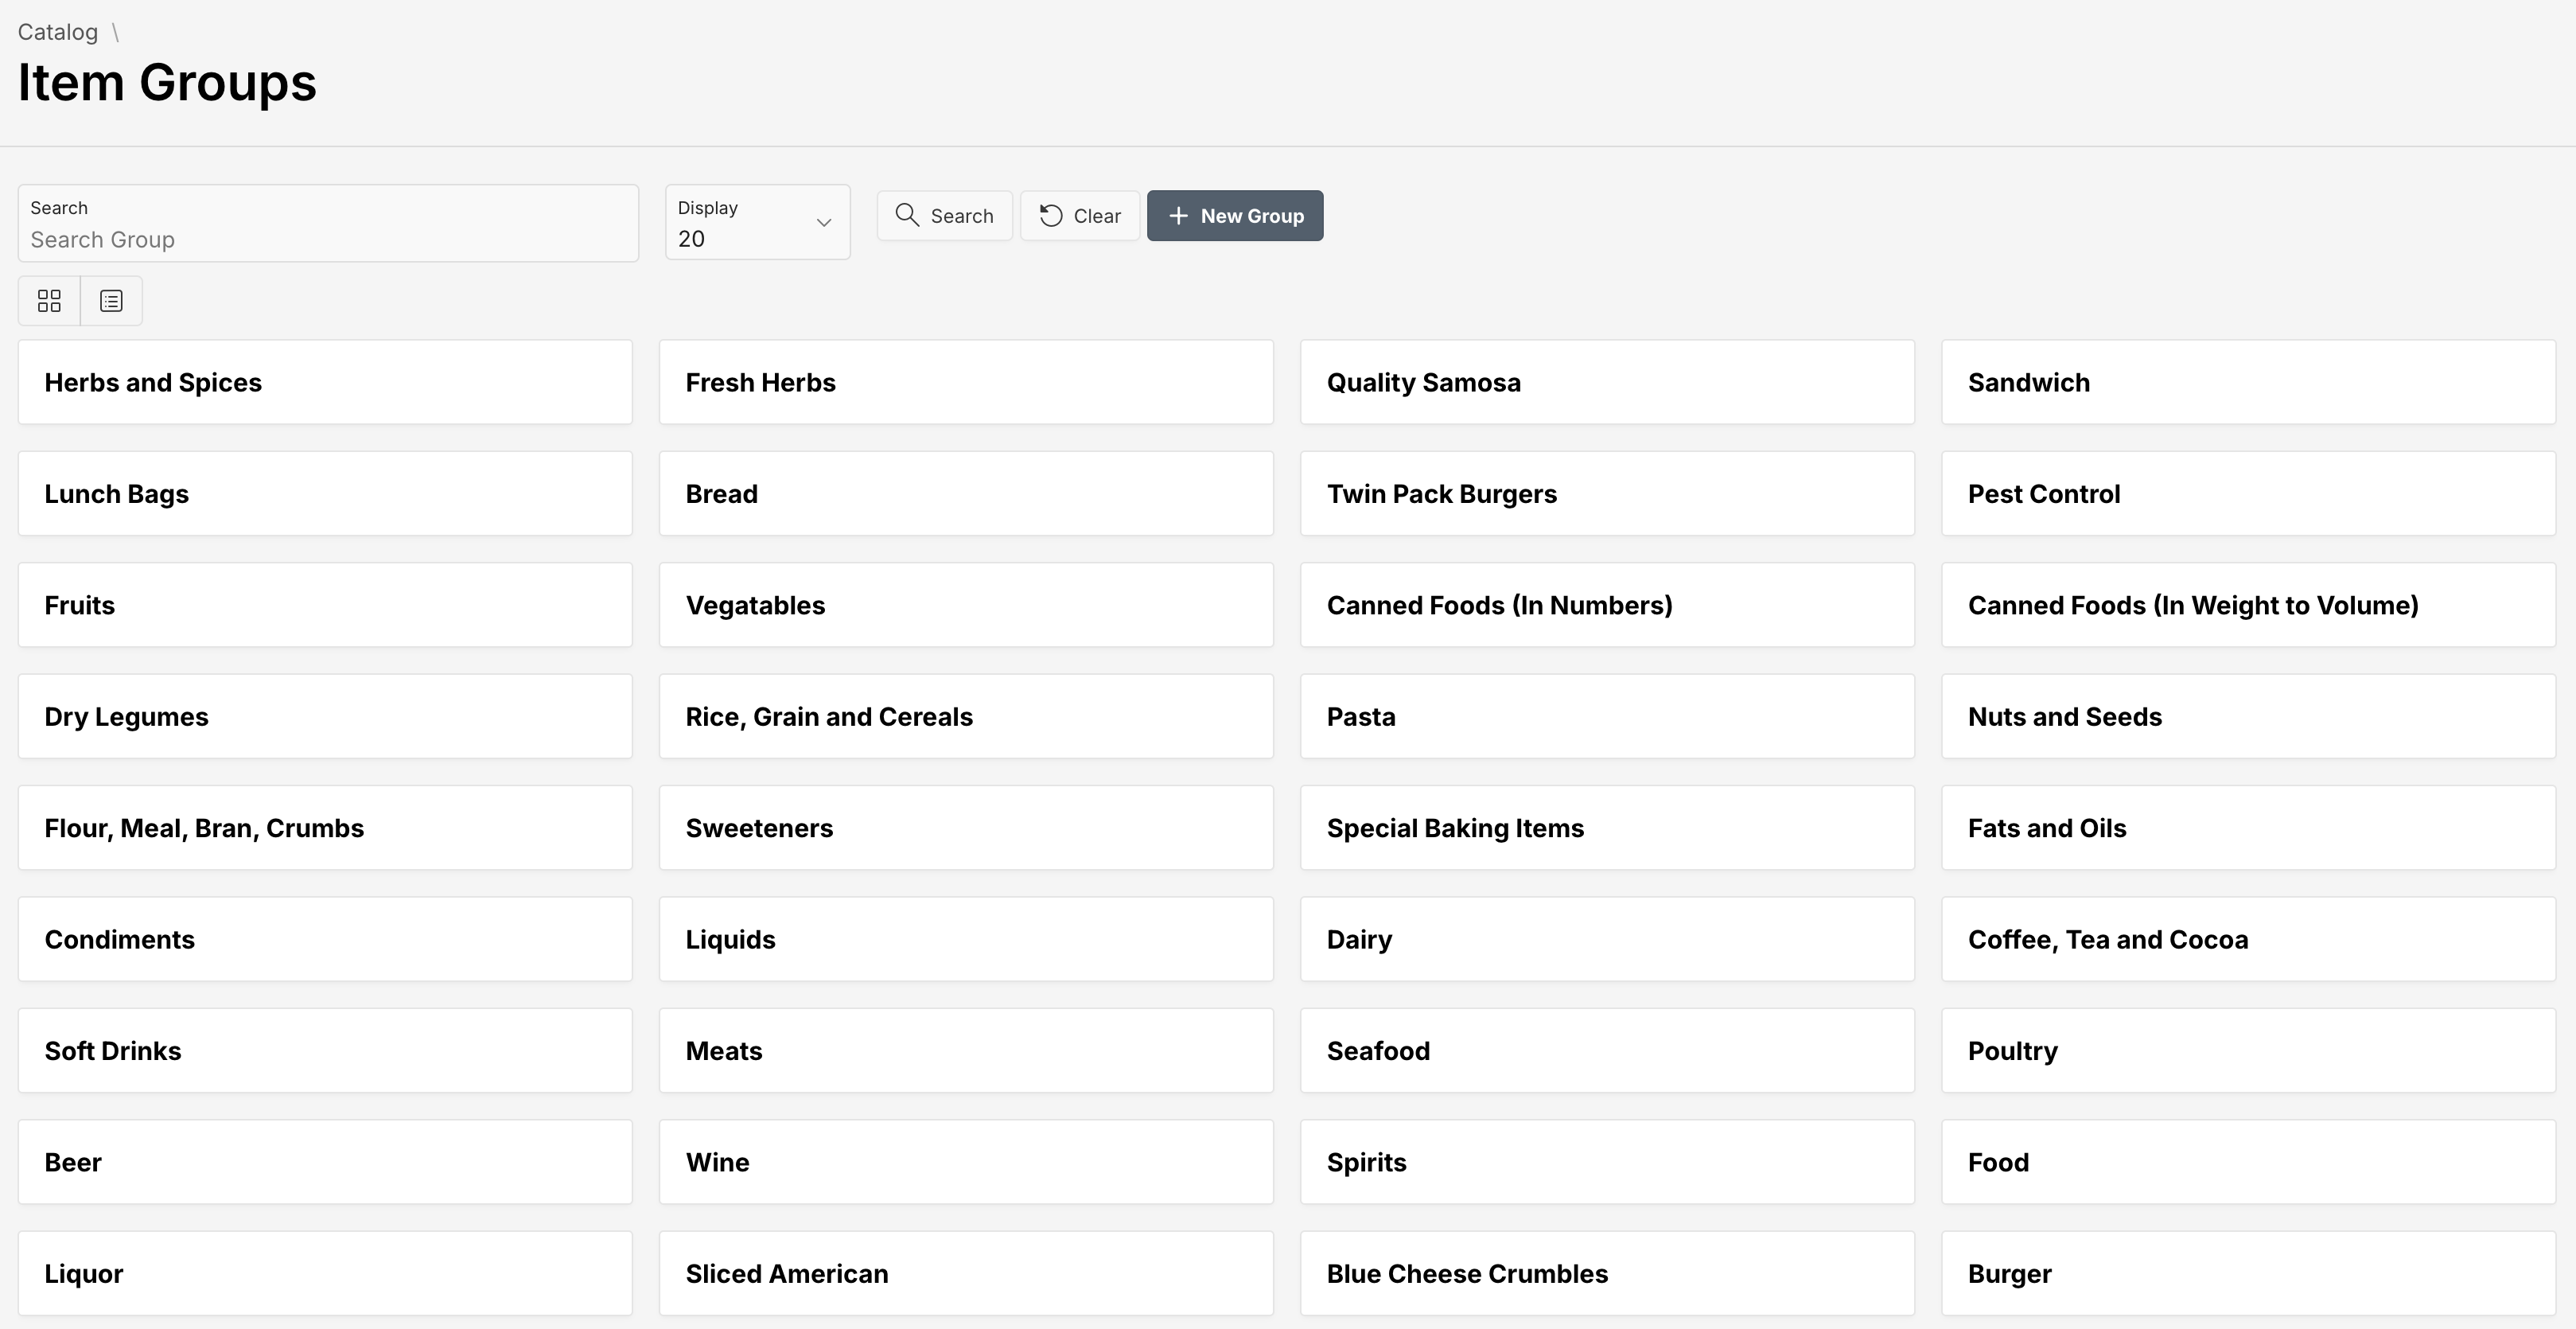 Item Group - Card View
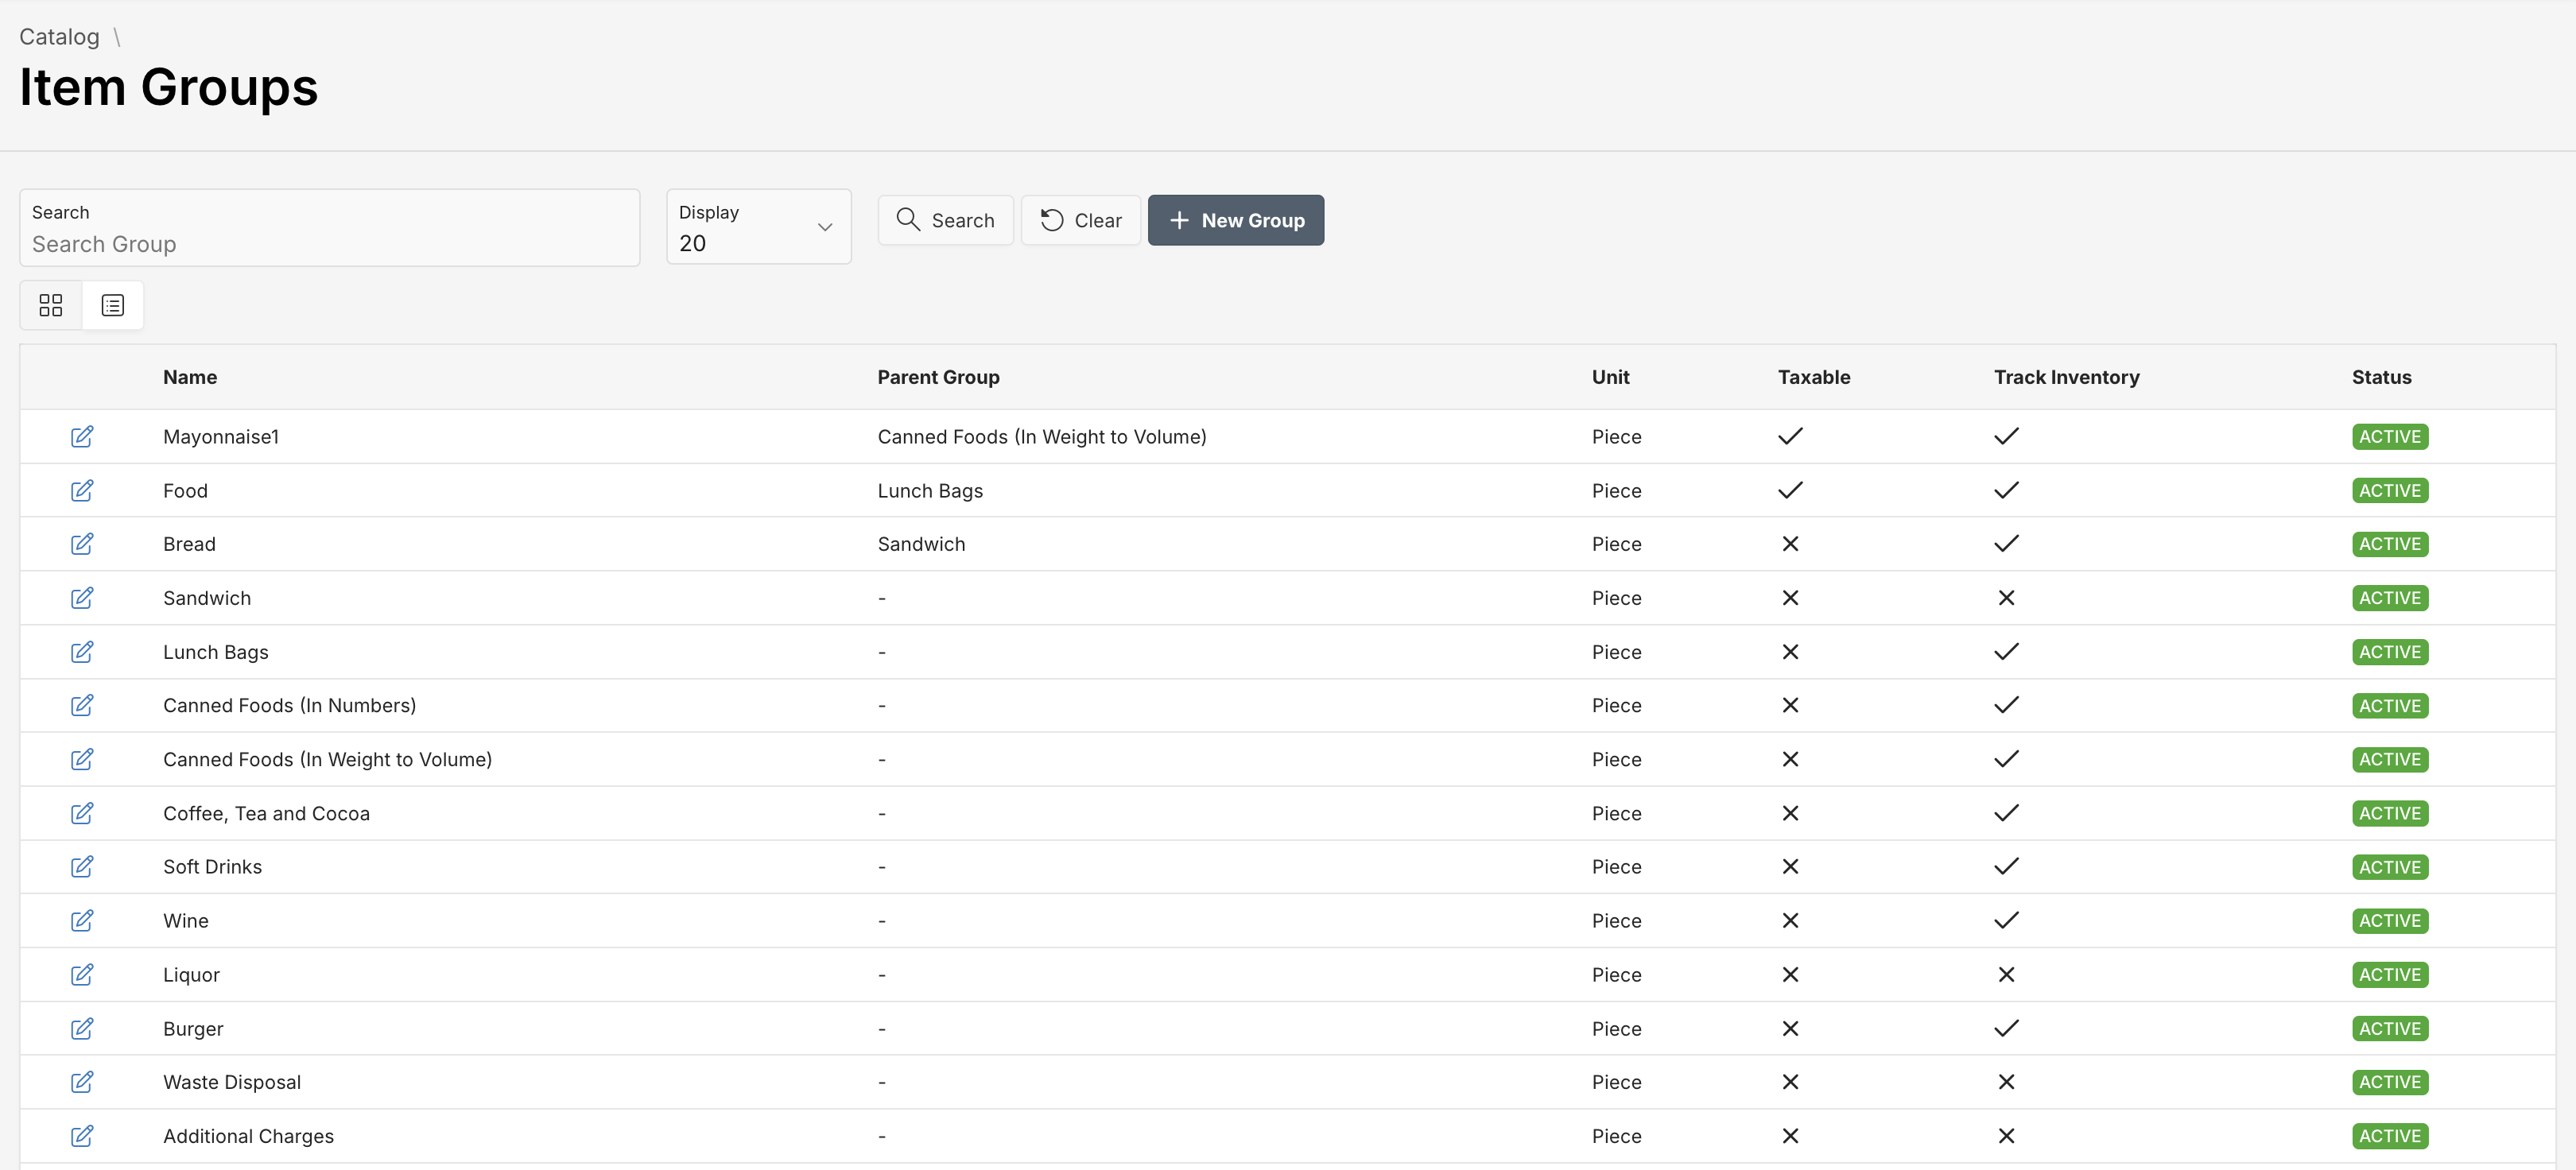 Item Group - List View
Creating a New Group
To add a new item group:
- Click the New Group button at the top of the screen.
- Fill in the required fields in the Group Information form.
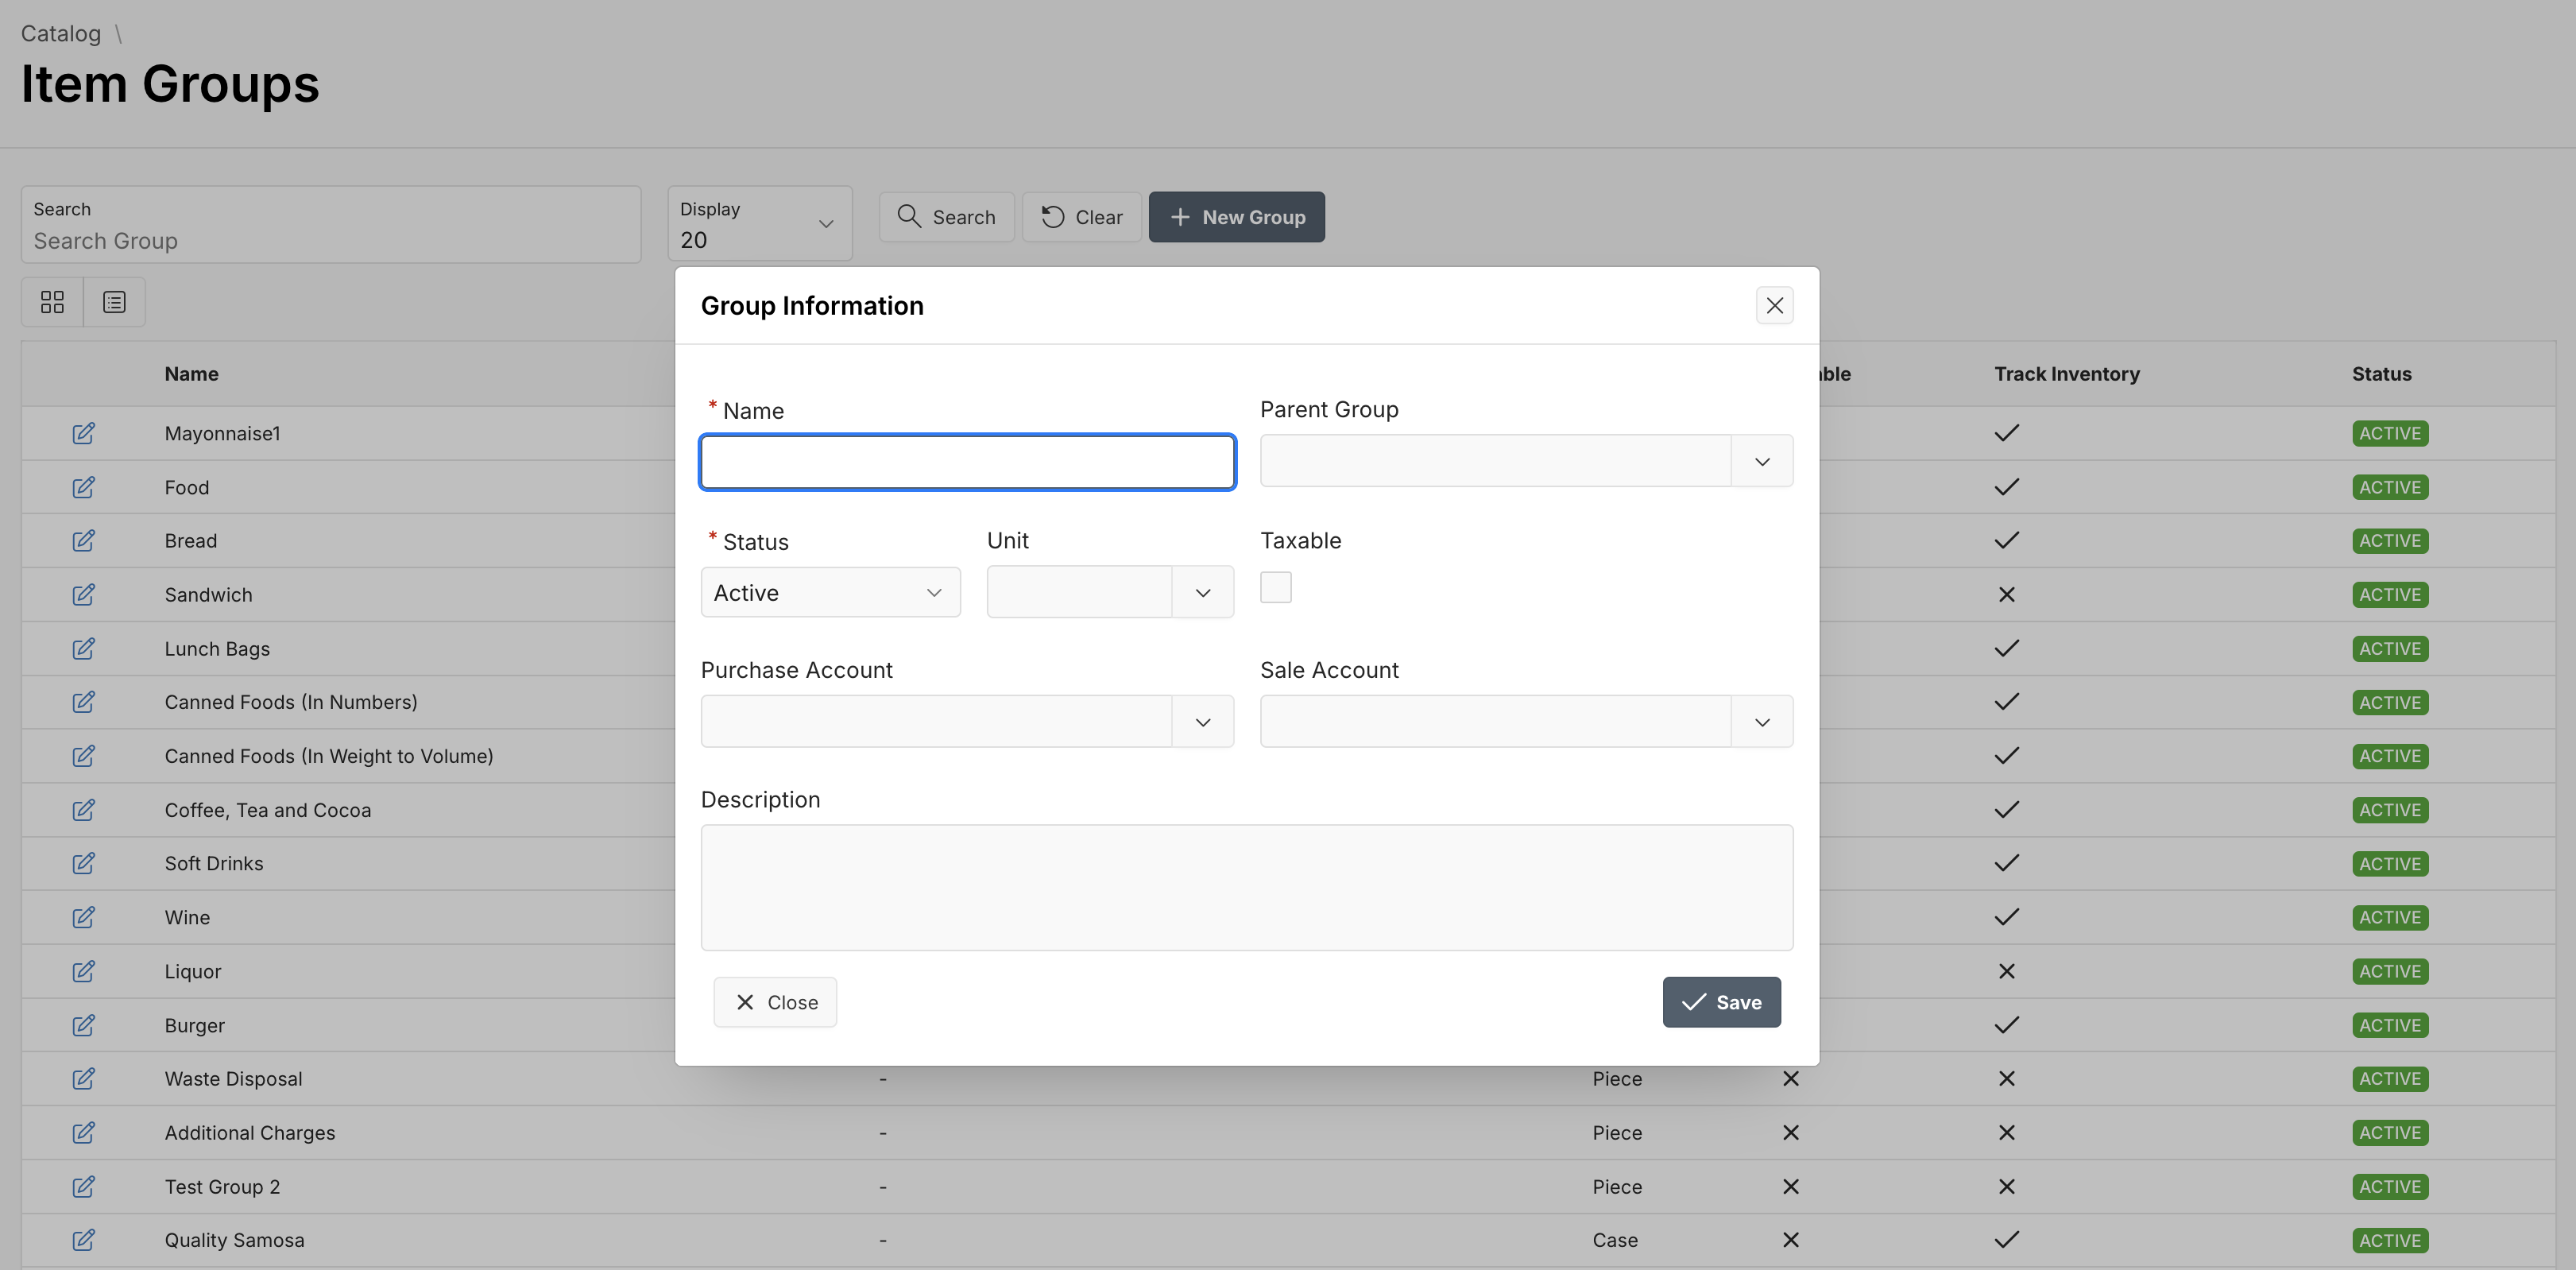
Fields Overview
You must fill in required fields, marked with a red asterisk (*).
| Attribute | Description |
|---|---|
| Name * | The group name (e.g., Sandwiches, Watches) |
| Parent Group | Assign a parent group to nest your item group. |
| Status * | Set to Active or Inactive. |
| Unit | Unit of measurement (e.g., Piece, Case). |
| Taxable | Check if the group items are taxable. |
| Purchase Account | Assign a purchasing General Ledger account. |
| Sale Account | Assign a sales General Ledger account. |
| Description | Add notes for internal reference. |
Once complete, click Save to create the group.
Editing an Existing Group
To edit an existing item group:
- Click the icon beside the item group in the list view.
- Update the details in the Group Information form.
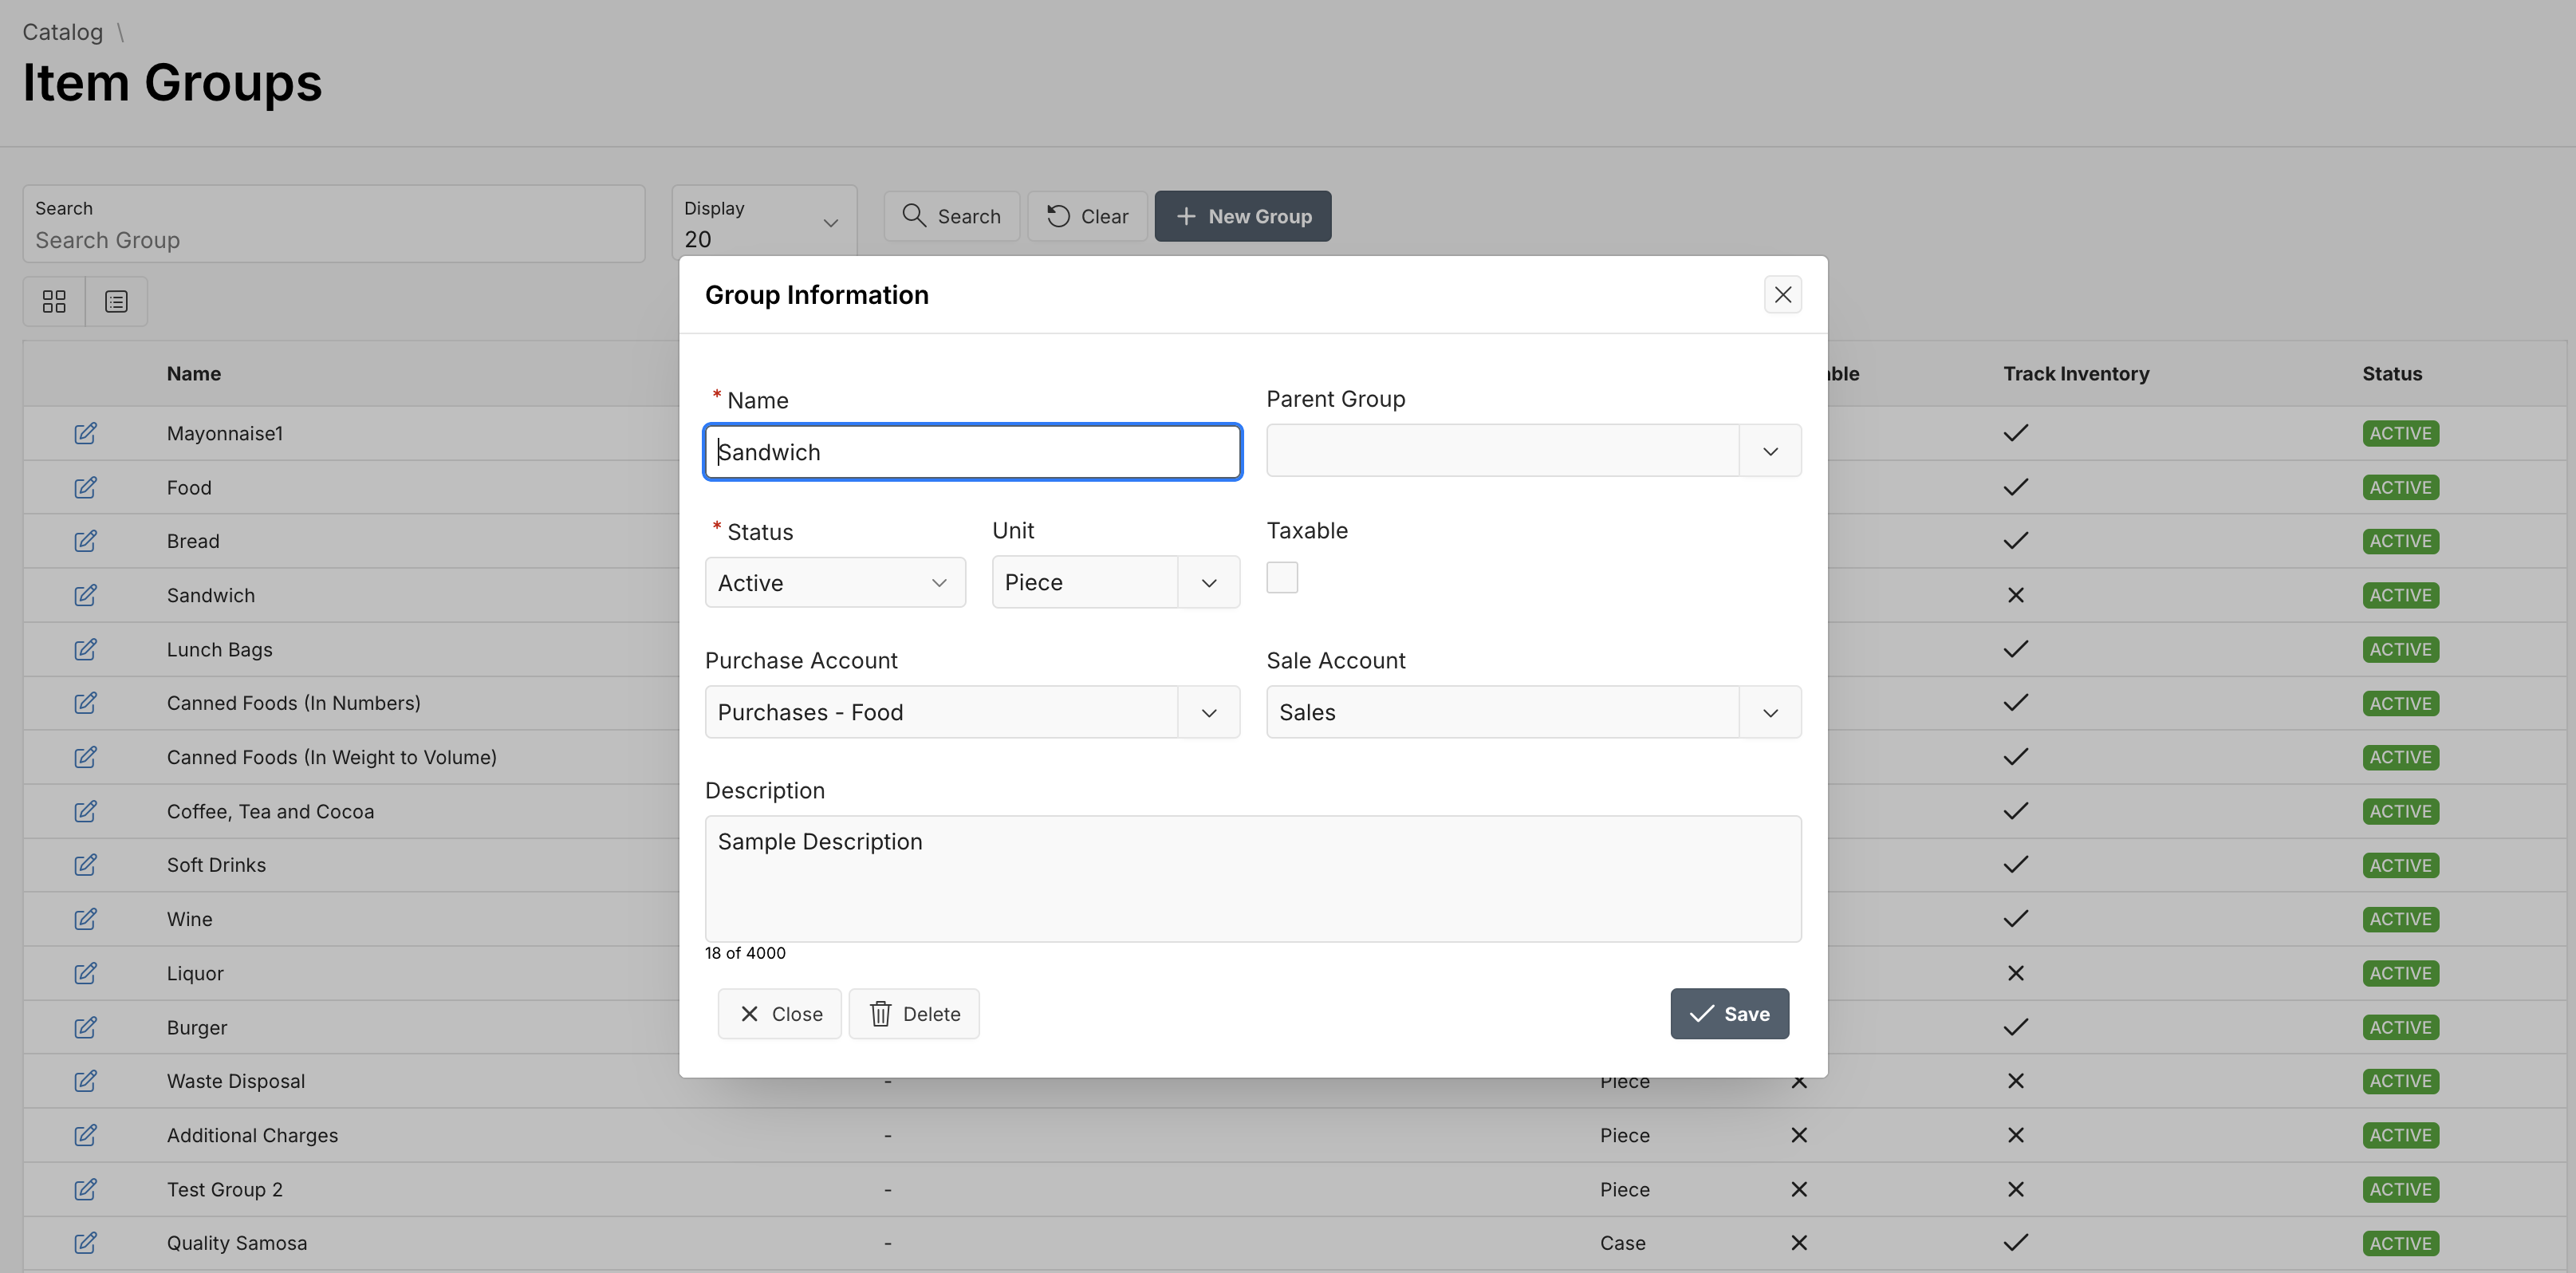
Click Save to apply changes or Delete to remove the group entirely.
Tips
- Use Parent Groups to organize subcategories. For example,
Breadcan be nested underSandwich. - Use the Card View for a more visual browsing experience.
- Set unused groups to
Inactiveinstead of deleting them for historical tracking.
FAQ
Q: Are Parent Groups mandatory?
A: No, you can leave the Parent Group field empty for top-level groups.
Q: Can I bulk edit groups?
A: Not currently. You must edit groups individually.